Pita: The Flatbread of the Middle East

Pita: A Flatbread Known by Many Names
Bread has been referred to as the staff of life, because bread has been seen as a life-giving necessity in cultures across the globe. It is a staple of life, and it is so… common. It’s no wonder that Jesus (who was born in Bethlehem, which means house of bread) left us his Eucharistic presence – the ongoing memorial of his suffering, death, and resurrection – in the humble and common form of bread and wine.
The region of the Middle East is made up of different countries, different peoples, and different religions and cultures. Their cuisine, however, is strikingly similar, despite the vast difference in religion. The region is home to Christians, Jews, and Muslims, and bread is common to all of them. Actually, for all three religions, bread is considered to be holy, a gift from God.
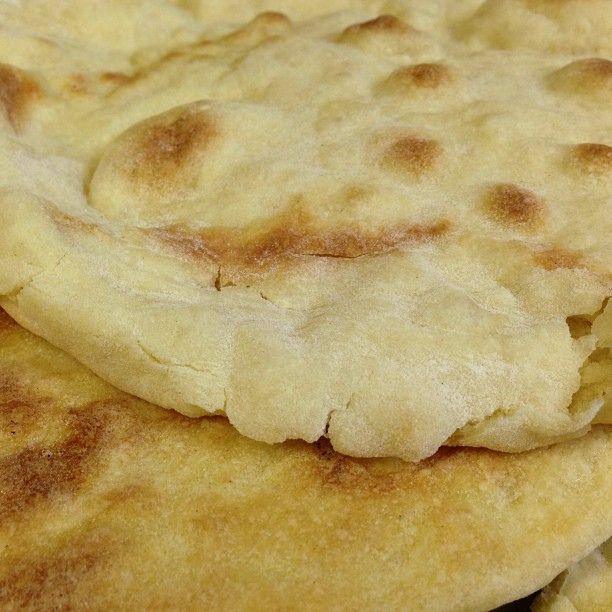
What we know in the United States as Pita is known by other names across the Middle East. As a matter of fact, Pita is a Greek name. It is also known in the States as Arabic Bread or Syrian Bread. The name for this bread in Arabic is Khubz.
There are many different types of “pita” bread in the Middle East. Some are thick, and some are thin. Some form a pocket inside when they are baked (which makes them ideal for sandwiches), and some do not. Some are topped with herbs and spices, others are not. But some form of flatbread is served with just about every meal in the Middle East. The bread is used to sop up sauces or dips (like Hummus), but it is also used as an eating utensil to scoop up meat, rice or vegetables. Some salads even have a flatbread as one of the main ingredients, like the well-known Fattoush salad.
The following quote from cookbook writer and historian Claudia Roden might give you an insight as to why the peoples of the Middle East have such reverence for bread. The quote comes from page 394 of her cookbook The New Book of Middle Eastern Food:
“The religious and superstitious feeling attached to bread is stronger in some countries than in others. To some it is, more than any other food, a direct gift from God. An invocation to God is murmured before kneading the dough, another before placing it in the oven. A hungry man will kiss a piece of bread given to him as alms. A piece of bread found lying on the ground is immediately picked up, kissed, and respectfully placed on a wall or table. At a gastronomic conference in Istanbul, I will always remember the look of horror on the Turks’ faces when one of the foreign contributors placed a piece of bread under the leg of a wobbly table to steady it. They all swooped to retrieve it.
“Bread is eaten with every meal and with every type of food. It is used instead of a fork – people break off a piece and double it over to enclose and pick up a morsel – or to dip in a sauce or cream salad, held delicately between the thumb and the first two fingers. In the street, pocket bread is cut in half and the pocket is filled with hot foods and salads. The bread is also toasted and broken into pieces and used as croutons or as a base for various dishes, such as fatta, fattoush, and in soups and stews. Some people, my father among them, claim that they cannot truly savor a sauce, or anything in fact, without a piece of bread.”
Make Pita at Home: It’s Easy & It’s Better for You
It’s certainly true that pita is readily available in grocery stores around the United States. But, I want to challenge you to make your own at home the next time you make Hummus. It’s easy to do, doesn’t demand a huge time commitment, and it’s healthier for you than store-bought pita, which is always full of additives and preservatives. Make it at home, and you’re making it healthy with just a few simple ingredients: flour, water, salt, yeast, and sugar.
Enjoy!
Pita: The Flatbread of the Middle East

Author: Jeff Young
Cuisine: Middle Eastern, Mediterranean
Recipe type: Bread
Ingredients
- 3 cups all-purpose or bread flour (I prefer to use King Arthur Flour, but you can use whatever you like), you will also need extra flour for dusting, etc.
- 3 tablespoons of extra virgin olive oil
- 2 teaspoons of instant yeast
- 2 teaspoons of kosher salt or sea salt
- ½ teaspoon of sugar
- 1 cup of water, plus a little more as needed
Instructions
- In a stand mixer with a dough hook (or a food processor fitted with a dough blade) combine the flour, olive oil, yeast, salt, and sugar. Turn the mixer or processor on medium-low and slowly add 1 cup of water. You are really looking for the dough to form a ball that is slightly sticky. You might need to add a little more water to make this happen. Usually, I use about 1 cup plus 1 to ounces of water before the dough is the way I want it to be.
- Now it's time to let the dough rise until it doubles in size, about 1 to 2 hours. You can leave the dough in the mixing bowl (or food processor bowl) or transfer it to a large glass mixing bowl. Cover the bowl with plastic wrap or a clean, heavy kitchen towel. Leave the bowl in a draft-free place for an hour or two.
- When the dough is ready, pre-heat the oven to 400. If you plan to use a BAKING STEEL or a pizza stone (or, in a pinch, a heavy cookie sheet), place it in the oven first to allow it to pre-heat too. Next, turn out the dough on a lightly floured surface and cut into 6 even pieces. Gently shape each piece into a ball. Then, one at a time, roll out each ball into a round about ¼ inch thick.
- Place each round on a lightly floured surface and lightly dust the tops of the rounds with flour, then cover with plastic wrap or a kitchen towel and allow to rise an additional 20 minutes.
- When you are ready to start baking the pita, dampen your hands with a little water and pick up one of the rounds of dough, patting off the excess flour and slightly moistening the dough. Then place the round directly on the BAKING STEEL, pizza stone or baking sheet. Repeat the process as room in the oven allows, then close the oven door and bake for 4 minutes. At the 4 minute mark, flip the pita and bake for another 4 minutes. The pita should then be puffed up and nicely browned. Remove the pita from the oven with a pizza peel or a large spatula. If you are going to eat it right away, then you may want to brush it lightly with melted butter. but that depends on what you are going to serve it with. If you are serving it with a sauce or a dip, like Hummus, then you do not need to brush it with butter.
- Repeat the process with the remaining rounds.
Notes
This recipe makes 6 pita breads.
Pita keeps really well. It can be frozen in packs wrapped in aluminum foil, then reheated in the oven when you are ready to eat.