Lebanese Hummus and Homemade Pita Bread

Hummus and The Lebanese Connection
We love hummus, and we eat it quite often.
But it wasn’t always that way. At least not for me.
For me — believe it or not — there was life before hummus.
I did not start to eat hummus until after I met my wife. Though, of course, when I first met her she was not my wife. She was just my friend. She then became my best friend — I don’t know if hummus played a part in that — and, eventually, she became my wife.
My wife Char is of Lebanese descent. Her paternal grandparents came to the United States from Beirut in the early 1900s. Her father is one of 9 children and her mother (who is of Creek Indian descent) is one of 6 children. That’s A LOT of family. And ain’t family what it’s all about?
Anyway, Char is who got me to try hummus for the very first time. And I am so glad that she did!

Hummus: It’s a Side, an Appetizer… It’s Even a Full Meal!
Hummus is a staple in our house. We make it all the time. Hummus is simple to make and delicious to eat.
We have served it as an appetizer, as a side, and even as a full meal.
Frequently we bless our friends and parish family with hummus… when we are asked to provide a dish for some parish ministry function or when we are invited to a party at a friend’s house. It’s gotten to the point that we are expected to bring hummus. 😉
I like that.
At home, though, we usually make hummus as a side dish. We might be making Kousa Mashi (Lebanese Stuffed Squash) or grilling lamb chops, or rolling grape leaves. Whatever dish it may be, hummus just seems like the perfect side.
During Lent, though, we can usually be seen whipping up a batch of hummus on Fridays. There’s no meat in hummus, so it’s cool for Fridays in Lent (or for any Friday throughout the year!). So, yes, we have even had hummus as our meal. And we weren’t disappointed either. Frequently I refer to our hummus as “yummus” because, yeah, it is that good.
And don’t be afraid to “kick it up a notch” with the cayenne! It’s awesome!
Lebanese Hummus

Author: Jeff Young
Cuisine: Middle Eastern, MediterraneanCuisine: Middle Eastern, Mediterranean
Recipe type: Appetiser, AppetizerRecipe type: Bread, Appetiser
Ingredients
- 2 cans of chick peas, rinsed OR 30 ounces of dried beans that have been prepared beforehand (see notes)
- ½ cup of tahini
- juice of 1 whole lemon
- ¼ cup of extra virgin olive oil (to start)
- ¼ cup of water (to start)
- 3 or 4 cloves of garlic
- ½ to 1 teaspoon kosher salt, or to taste
- ¼ teaspoon Cayenne pepper, or to taste
- Fresh parsley, chopped, for garnish
Instructions
- Put chick peas, tahini, lemon juice, garlic, water, and olive oil, salt and cayenne in the work bowl of a food processor.
- Process until it becomes the consistency of hummus. You will probably need to add more olive oil or water. Just do so slowly.
- Taste. Taste. Taste. You don't want the hummus too thick or too runny. Make it to your liking. Also, add as much salt and cayenne as you like. Just remember to do so slowly.
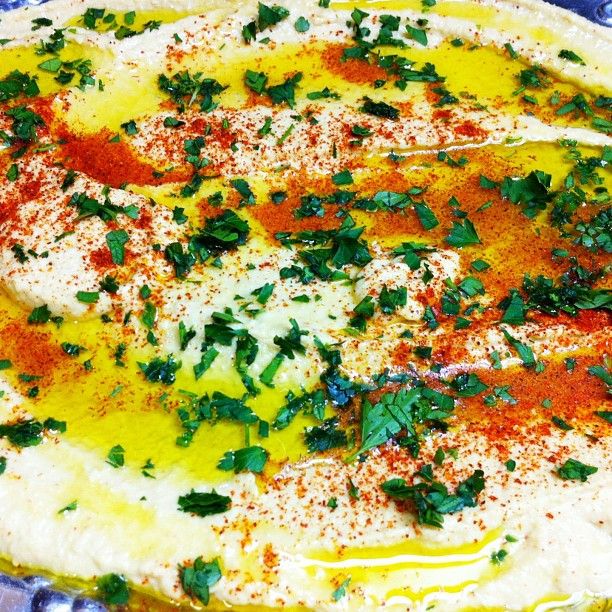
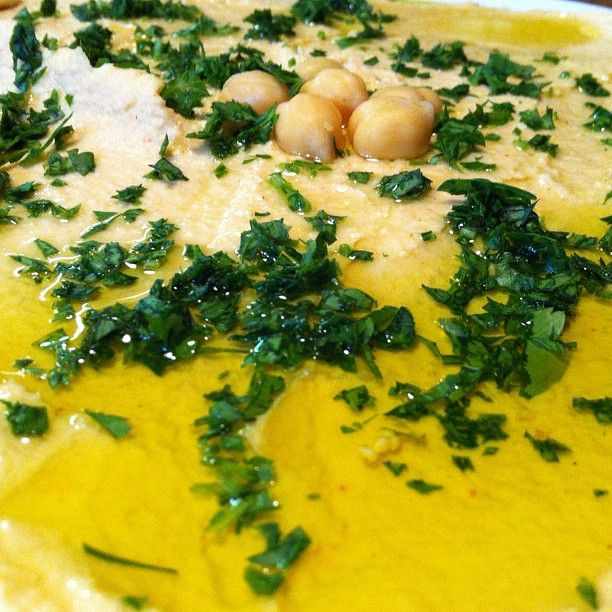
- Place hummus into a round flat dish. Drizzle liberally with extra-virgin olive oil. Garnish with chopped parsley, and serve with hot pita bread.
Notes
Preparing Dried Chick Peas for Hummus
If you would prefer to use dried beans over canned, the follow these simple directions for a 1 lb bag of dried chick peas:
- In a large glass bowl, soak the beans overnight. Make sure that there is enough water to cover the beans by a couple of inches.
- Drain the chick peas and rinse. Add to a large stainless steel pot and cover again with water (twice the amount of water to beans). Add ½ teaspoon baking soda.
- Bring to a boil, cover, and lower heat to a simmer. Continue to simmer until beans are softened, about an hour.
- Remove from heat, strain, and allow to cool.
The chick peas are now ready to use to make hummus.
Making Pita Bread
When you are among Lebanese folk, the word “pita” doesn’t usually come up in conversation. At least not in Louisiana. Usually, the Lebanese refer to it as “Arabic bread,” and that is just A-OKAY with me. I love this stuff!
However, I have to confess that making “Arabic bread” is an act of love. It takes time. And it takes effort, as you will soon see below. 😉
If you have one, you might want to try the pita bread on The Baking Steel. Doing so would cut down on bake time and it would give the bread a crispier outer texture.
However, the recipe below does not assume that you are using a Baking Steel.
Homemade Pita Bread

Author: Jeff Young
Cuisine: Middle Eastern, MediterraneanCuisine: Middle Eastern, Mediterranean
Recipe type: Appetiser, AppetizerRecipe type: Bread, Appetiser
Ingredients
- 3 cups all-purpose or bread flour (I prefer to use King Arthur Flour, but you can use whatever you like), you will also need extra flour for dusting, etc.
- 3 tablespoons of extra virgin olive oil
- 2 teaspoons of instant yeast
- 2 teaspoons of kosher salt or sea salt
- ½ teaspoon of sugar
- 1 cup of water, plus a little more as needed
Instructions
- In a stand mixer with a dough hook (or a food processor fitted with a dough blade) combine the flour, olive oil, yeast, salt, and sugar. Turn the mixer or processor on medium-low and slowly add 1 cup of water. You are really looking for the dough to form a ball that is slightly sticky. You might need to add a little more water to make this happen. Usually, I use about 1 cup plus 1 to ounces of water before the dough is the way I want it to be.
- Now it's time to let the dough rise until it doubles in size, about 1 to 2 hours. You can leave the dough in the mixing bowl (or food processor bowl) or transfer it to a large glass mixing bowl. Cover the bowl with plastic wrap or a clean, heavy kitchen towel. Leave the bowl in a draft-free place for an hour or two.
- When the dough is ready, pre-heat the oven to 400. If you plan to use a BAKING STEEL or a pizza stone (or, in a pinch, a heavy cookie sheet), place it in the oven first to allow it to pre-heat too. Next, turn out the dough on a lightly floured surface and cut into 6 even pieces. Gently shape each piece into a ball. Then, one at a time, roll out each ball into a round about ¼ inch thick.
- Place each round on a lightly floured surface and lightly dust the tops of the rounds with flour, then cover with plastic wrap or a kitchen towel and allow to rise an additional 20 minutes.
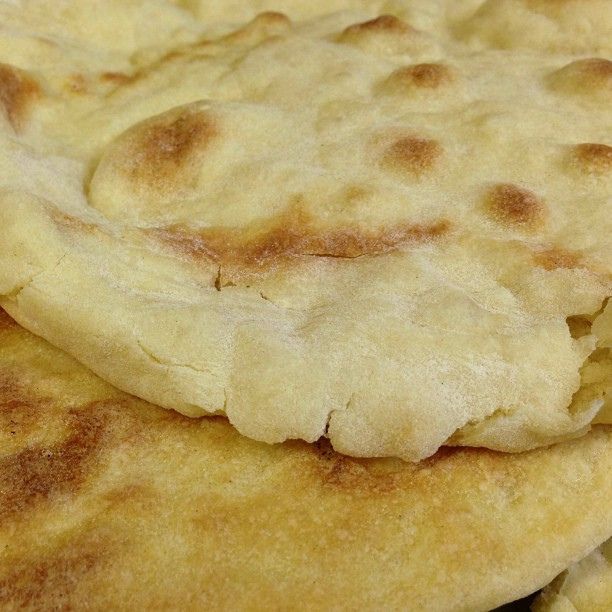
- When you are ready to start baking the pita, dampen your hands with a little water and pick up one of the rounds of dough, patting off the excess flour and slightly moistening the dough. Then place the round directly on the BAKING STEEL, pizza stone or baking sheet. Repeat the process as room in the oven allows, then close the oven door and bake for 4 minutes. At the 4 minute mark, flip the pita and bake for another 4 minutes. The pita should then be puffed up and nicely browned. Remove the pita from the oven with a pizza peel or a large spatula. If you are going to eat it right away, then you may want to brush it lightly with melted butter. but that depends on what you are going to serve it with. If you are serving it with a sauce or a dip, like Hummus, then you do not need to brush it with butter.
- Repeat the process with the remaining rounds.
Notes
This recipe makes 6 pita breads.
Pita keeps really well. It can be frozen in packs wrapped in aluminum foil, then reheated in the oven when you are ready to eat.
What About You?
Like hummus? Like pita?

Join Jeff Young, The Catholic Foodie and Fr. Kyle Sanders on a Food Meets Faith Pilgrimage to the Holy Land
Registration for my next pilgrimage to the Holy Land is now open! The pilgrimage will be from February 26 to March 8, 2015. Fr. Kyle Sanders, a priest of the Archdiocese of New Orleans, will travel with me as the Spiritual Director.
I want to invite you to grow in faith together with me around the table of the Eucharist and around the dinner table in the Holy Land.
Register before August 1, 2014 and you will receive a free autographed copy of my soon-to-be-released cookbook: Around the Table with The Catholic Foodie: Middle Eastern Cuisine, published by Liguori Publications.
TO REGISTER: CALL SELECT INTERNATIONAL TOURS AT 1-800-842-4842.
See full itinerary HERE. You can also download it.